Documentation
Content
PBXflow is an extension to VitalPBX that allows a visual approach to configuring and managing the underlying asterisk dialplans by providing flowchart like visual graphs and a set of tools to configure the various VitalPBX modules in an intuitive and seamless way.
Main Features
- VitalPBX v3 and v4 compatible
- implement on new or existing Installations
- Automatic holidays from all over the world
- Normalize, add silence to file or recordings
- Multi-tenant capable
- Duplicate modules
- Trunk templates
- Let’s you undo or redo changes
- Calendar add-on
- Text to Speech Recording Generator
- Route Visual graphs
Quick Start
Installation Guide
- Download the install script and run it in your existing VitalPBX System
wget http://flow.riegert.de/flow.sh - Add execute permission for the script by running the following command
chmod +x flow.sh - Finally execute the script and run
./flow.sh
If everything works correctly, flow should be downloaded and installed into your system.
Now you should be ready to start using PBXflow, simply navigate to https://yourdomain.com/flow, you will need to activate your license before you can start using PBXflow and login using your VitalPBX user credentials.
If you find issues or bugs regarding PBXflow please let us know: [bug tracker – link].
Setup
Once PBXflow is installed, access the web interface (your-vitalpbx-domain.com/flow) and you will be redirected to the PBXflow login page.
Use the same login credentials as for VitalPBX (no registration necessary) and click the ‚activate button‘ on the login page.
Please note, you will need an activate license before you can use PBXflow.
You can purchase a license at any time in our [SHOP-LINK].
Inbound Routes
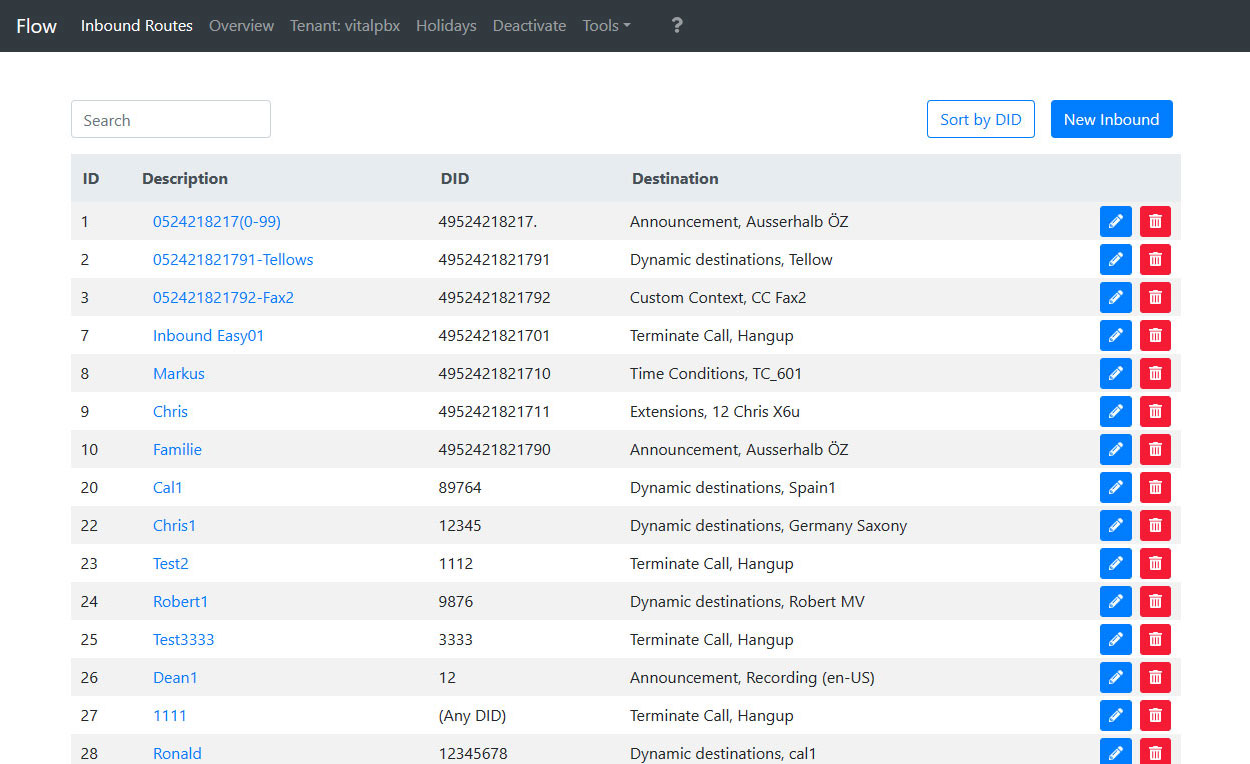
Inbound routes is the first page you see after you login, on this page you can create, edit or delete any existing inbound route. If you are unfamiliar with inbound routes, they are simply routes used to route incoming calls to specific destinations based on a certain criteria allowing you to build up your call flows.
To create a new inbound route, you can simply click on the „New Inbound“ button and fill in the Description, DID, CID Name and the Language for the new route. Once you’ve done so you can click on „Submit“ and a new item should appear on the list highlighted in green.
After creating the route you can start assigning destinations to it in the route flow view, to access it, click on the name of the route you wish to start configuring and you will be taken to that page.
Flow view
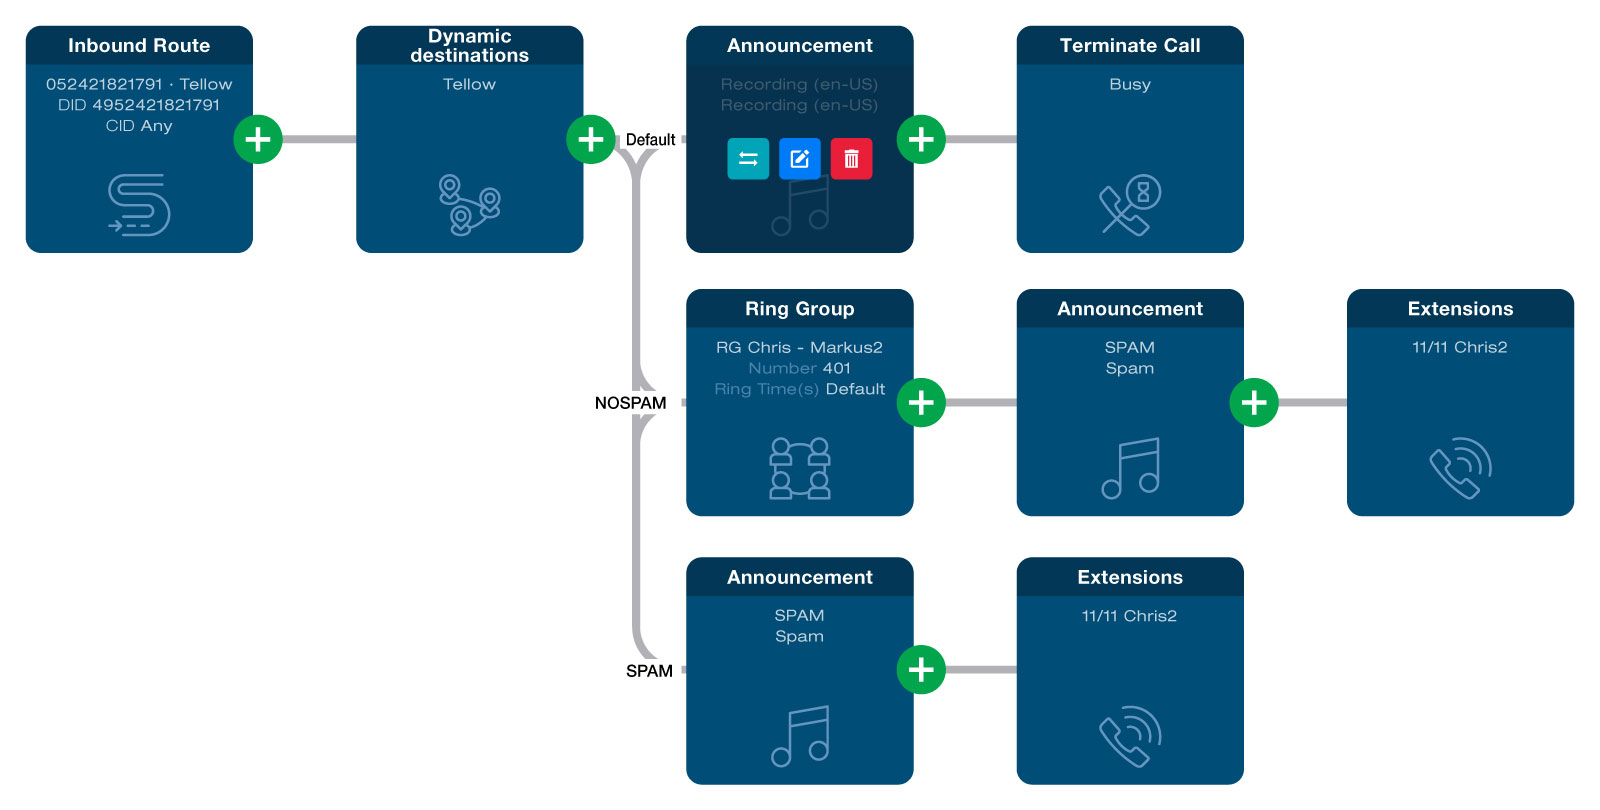
The flow view allows you to visualize and build your call flow. It’s one of the main features of PBXflow that greatly improves productivity when setting up a new dial plan, as instead of navigating to each individual module configuration page to create or edit a destination, you can do it all in one centralized place and get an immediate visualization of how everything is connected.
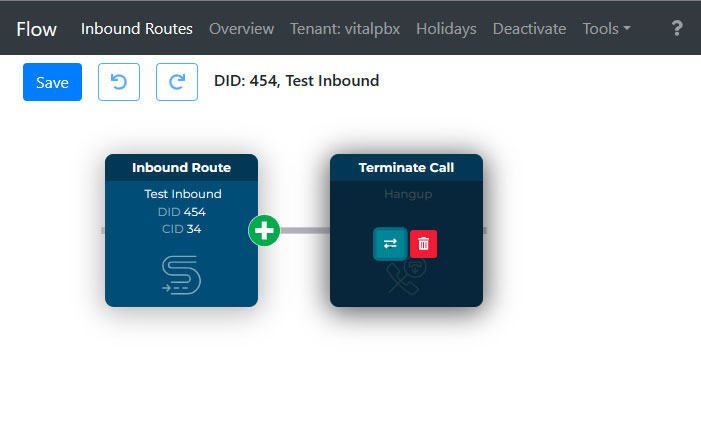
When you open the flow view on a new inbound route, you should see the same screen as above, where each card represents a VitalPBX module. In this case we have two module cards the Inbound Route and Terminate Call modules connected to each other.
Saving and History: also notice the three buttons on the top left corner, the save button is used to save and apply the changes you’ve made to VitalPBX and the other two are used to undo and redo changes respectively.
Viewport controls: You can use the viewport control buttons on the bottom left corner of the screen to zoom in/out and center the view respectively, and to pan the view around simply click and drag anywhere on the viewport.
Basic Call Flow
Lets walk through creating a simple call flow that plays an announcement when a call is made and then hangup:
- From an new inbound route as created earlier, hover on the terminate call module and click the blue button to replace it with an announcement module
- Then Select the announcements module using the dropdown list on the “Replace Destination” dialog
- And finally select the announcement you wish to be played from the list and click submit to finish replacing
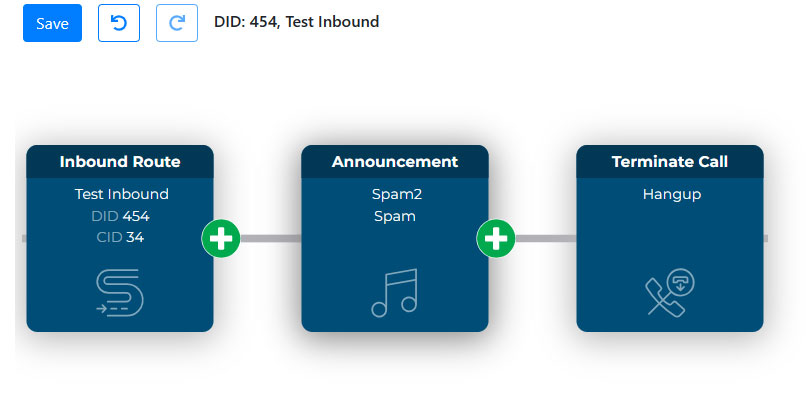
You should see the terminate call card title change from „Terminate Call“ to „Announcement“ and a new card should appear pointing to the next module that will be used after the announcement finishes playing.
As you can see, PBXflow makes it extremely easy to make changes and build up yout call flows, you can repeat the same simple steps to make additional changes to your call flow, for example change the destination of the announcement module to an IVR or any other module depending on your use case. You can also add a destination from a existing module or insert a new module between two existing ones by clicking the green plus button on the module card.
Modules
The concept of modules in PBXflow is similar to that in VitalPBX, each module corresponds to a specific feature in your PBX system, for example, if you need to make announcements during a call, you can use the Announcements module, similarly, if you want to automate incoming calls and route them to the appropriate department you can utilize the IVR module.
Most of the primary VitalPBX modules are supported by PBXflow, however any unsupported module can still be used in the Flow View, but they are labeled as „Complex Modules.“ This indicates that they can only be edited using the VitalPBX UI.
Terminate Call: The Terminate Call module is used to end a call. It can be used to disconnect a call after a certain duration or when a certain condition is met.
Extensions: The Extensions module is a complex module that allows users to create and manage extensions. It can be used to configure various settings for extensions, such as voicemail, call forwarding, and call waiting. PBXflow allows you to use extensions in call flows but you have to use the VitalPBX UI to setup one.
Time Conditions: The Time Conditions module allows users to route calls based on the time of day. Users can create rules that specify which destination to route calls to based on the PBX time group (default), calendar time group (PBXflow), or a custom module. Multiple calendars can be added, edited, or deleted, and users can select time ranges, multiple dates, or weekdays.
Dynamic Destinations: The Dynamic Destinations module cannot be created in the flow, but users can change its destinations by configuring rules based on specific criteria. For example, users can create rules that route calls to different destinations based on the caller ID or dialed number.
IVR: The IVR (Interactive Voice Response) module is used to create voice menus that allow callers to interact with the system using their phone keypad. It allows users to create custom menus and configure various options, such as timeouts and retries. Using PBXflow you can quickly change the timeout, invalid or any digit entries for the IVR.
Announcements: The Announcements module is used to play pre-recorded messages to callers. It allows users to upload or record custom messages and configure various options, such as the playback order and repeat intervals.
Holidays: The Holidays module allows users to create, edit, and delete holidays. Users can choose a name and country/state, and can also select a different time zone if needed. The module uses a calendar-style interface and a database of official holidays around the world. Users can also add or delete custom holidays as needed.
Night Mode: The Night Mode module is used to route calls differently during certain hours, such as outside of business hours. It allows users to create rules that specify which destination to route calls to during specific time periods.
Conference: The Conference module is used to create conference rooms that allow multiple callers to participate in a call together. It allows users to configure various options, such as the maximum number of participants and the conference PIN.
Custom Application: The Custom Application module is used to execute custom scripts or applications. It allows users to create custom modules that can perform a wide range of functions.
Custom Destination: The Custom Destination module allows users to create custom destinations that can be used in call flows. Custom destinations can be created by providing a a number to dial and a description. For more information on custom destinations, you can visit the VitalPBX Wiki.
DISA: The DISA (Direct Inward System Access) module is used to allow external callers to access the PBX system and make calls as if they were internal users. It allows users to create custom access codes and configure various options, such as call restrictions and timeouts.
To set up the DISA module in PBXflow, you can use the add or replace module dialog and select „DISA“ from the dropdown list. You can then configure the access code and other settings for the module.
Trunk: The Trunk module is a complex module that allows users to configure trunk settings, such as SIP settings, registration, and authentication. PBXflow allows you to use trunks but you are required to use the VitalPBX interface to configure your trunks. Learn more about trunks in VitalPBX Wiki.
Trunk Presets: Trunk pressets or templates, they are pre-filled trunk settings, so users only need to add their username and password. Many providers will be available, and new providers will be added in later versions.
Voicemail: The Voicemail module allows users to configure voicemail settings, such as busy, direct, and unavailable recordings. The busy recording is played when the extension is busy, the direct recording is played immediately after an announcement, and the unavailable recording is played when the extension is unavailable.
TOOLS
PBXflow among other features has a set of tools designed to address common productivity issues we’ve noticed when working with VitalPBX. You can access these tools using the tools dropdown menu and currently there are three tools available:
Duplicate Tools: Allows you to duplicate and clone any existing ivr, trunk, or queue so that they can be used as a destination in other dialplans.
Trunk Presets Tool: Used to create new trunks from a given predefined preset allowing to create new trunks without having to repeat settings that are generally the same for most trunks.
Text to Speech Tool: Used to generate voice recordings for announcements, supports Google TTS Voices and ElevenLabs default voices.
Calendar Module
The calendar module is a module that allows you to create calendars and define events that will direct to a specific module if the current date matches the date defined on the calendar. The following is a step by step guide to using it on a call flow:
- In the inbound routes page
- Click create to create a new inbound route and fill in the information
- Then click edit to edit open the flow view for that inbound route
- In the flow view, Click the replace destination button (🔁) on the “terminate call” module to replace it with a different module
- On the module selection menu, choose/search for the calendar module and click “New” to add a new calendar on the list
- Fill in the name of the calendar, for example “Agents on call” and click the plus (➕) button twice to create two Destination, and fill in the name of the agents, for example, Chris for Destination 1, Markus for Destination 2 and Ana for Destination 3
- Click Submit to create the calendar and then select it from the Module selection list and click Submit again to add it to the call flow
- A Card with the name of the calendar you created should appear on the flow view
- Click on edit on that card to view the url for editing the calendar events. You should see the following when you do:
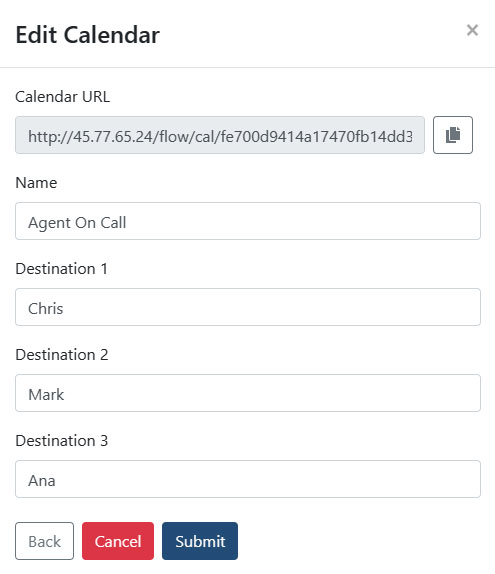
Figure 5: Edit Calendar
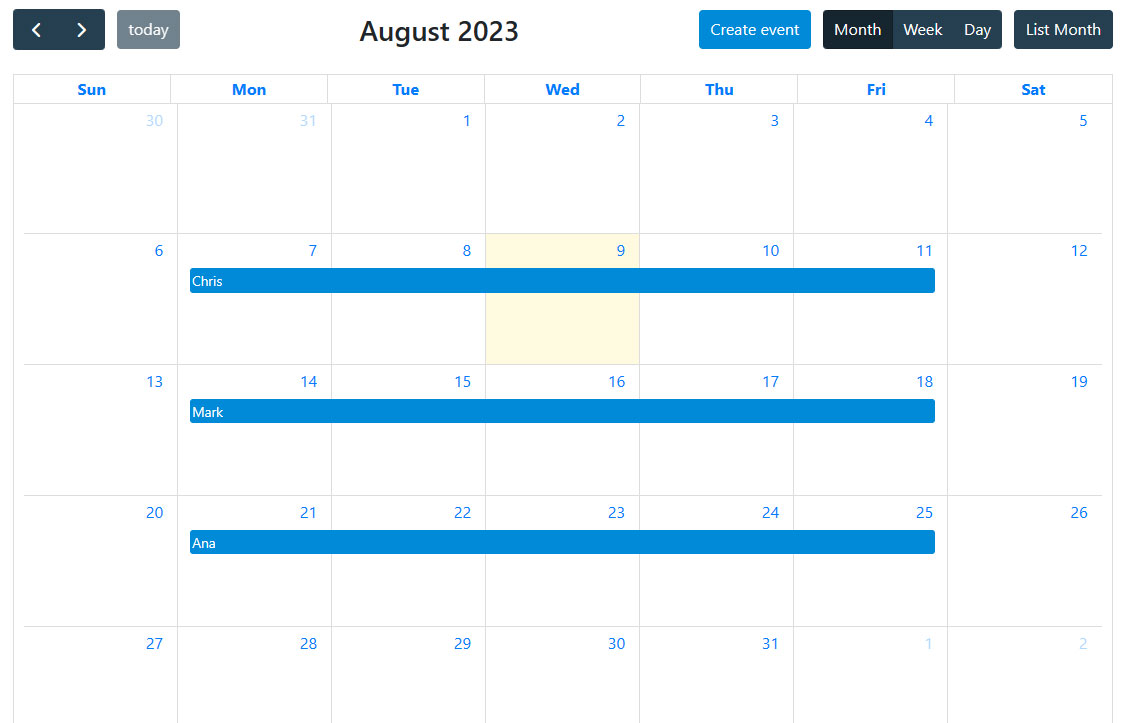
Figure 6: Add Events to Calendar
Now on the flow view, close the calendar menu if you haven’t already. And then start defining the destinations for each of our events, for example, point the events to the agent’s extension, as seen on the image bellow:
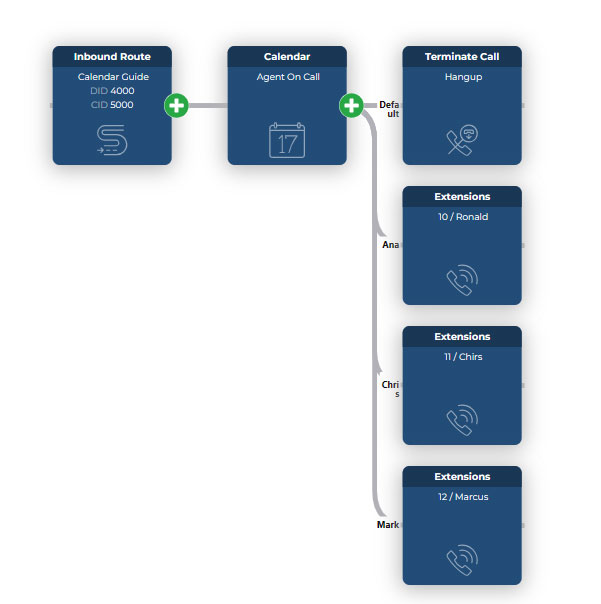
Figure 7: Calendar Flow
Holidays module
Flow includes a holiday module that allows conditional routing to specific destinations within a call flow based on whether the current date is a holiday or not. Our holiday module supports over 150 countries‘ holidays with additional support for custom dates if needed.
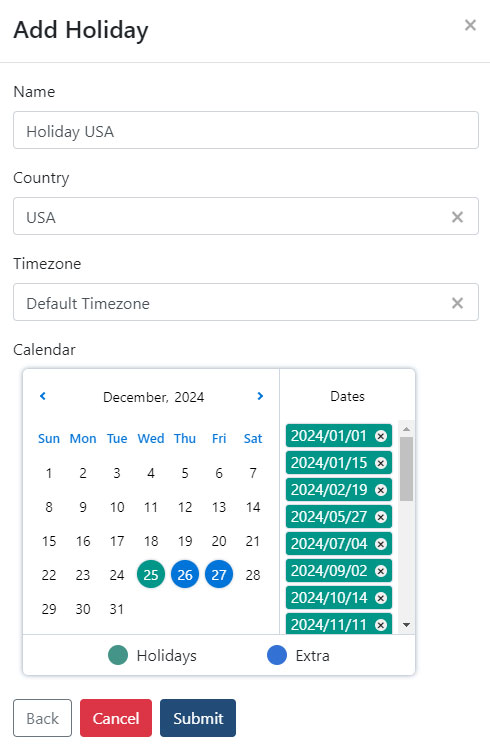
Follow this comprehensive guide to learn how to effectively utilize the Holiday module:
- Begin by creating a new inbound route or utilizing an existing one.
- Access the flow view and locate the „add“ or „replace“ destination buttons on the desired card where you wish to integrate the holiday module.
- On the module selection screen, search for or select the holiday module, then click on „NEW“ to create a new instance.
- Specify the name of the holidays, such as „Germany Holidays,“ and choose the country from which you want the holidays to be recognized.
- If you have custom dates that should also be considered holidays, you can add them to the calendar as well.
- Upon completing the form, click „Submit“ to create the holiday instance. On the module selection screen, choose the newly created holiday module and click „Submit“ again to add it to the call flow.
- Once added to the call flow, you will notice two destinations associated with the module: the default destination for regular dates and the holiday destination.
- Customize these destinations to align with your specific use case. For example, you can direct calls to a pre-recorded „We’re on a holiday“ announcement for the holiday destination, while the default destination can lead to an extension, as depicted in the image below:
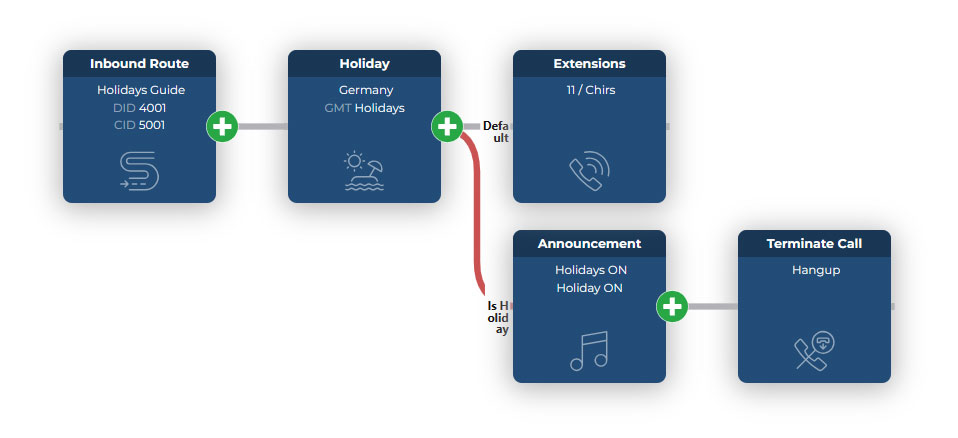
Figure 9: Holidays Module
Text to Speech tool
This guide will provide step-by-step instructions on how to generate recordings using the text-to-speech tool. To get started, you will first need to choose a voice generation provider. Currently, we support two options: the GoogleTTS API and ElevenLabs. You can choose either of these providers as long as you have the required API keys. In this guide, we will be utilizing the ElevenLabs voices.
Head over to the ElevenLabs website and sign up for an account to obtain your API key. Once you have signed up, follow these steps to retrieve your API key and configure it to be used with the text to speech tool:
- Access the ElevenLabs dashboard.
- Click on your profile icon.
- From the dropdown menu, select „Subscription“.
- Copy the API key displayed on the dashboard.
- Open the flow at your-pbx-domain.com/flow.
- Click on „Tools/Text To Speech“ from the navbar.
- Click on the settings button to open the API Key configuration menu.
- Paste the API key you obtained from ElevenLabs into the „Eleven Labs API Key“ field.
- Click “Update” to update your settings and the close the menu by clicking “Cancel”.
By following these steps, you will have successfully obtained your API key from the ElevenLabs dashboard and successfully configured it to be used with the text to speech tool. Now you can start generating the recordings from the Text to Speech Dialog. Here’s a overview of the options available:
Recording Name: The recording will be saved as with this name and you will be able to identify it by its name when using it within a module that supports recordings.
ElevenLabs Voices: Select this to use the ElevenLabs voices API to generate recordings. If you followed the guide above you should have an API key configured and you should be good to generate your recording.
Message: The text that will be converted to speech using your chosen voice generator. You have to click “Listen” every time you change this field in order for the audio to be regenerated.
Google Voices: Select this if you want to use Google’s TTS API to generate the recordings. You will need to configure your google cloud service key on the settings. You can follow this guide to learn how to obtain a service key
Prompt: If you having trouble coming up with text, you can ask ChatGPT to generate any text you’d like, just fill in your text, for example you could ask something like “Generate a call center greeting message for MyCallCenter company”. If you have your API Key setup, the generated text should be automatically filled in on the “message” field.
These are all the main options available to configure, to wrap up this guide, fill in your message and once your done writing click “Listen” to generate the message and then “Create” to save the recording and start using it on your call flow!
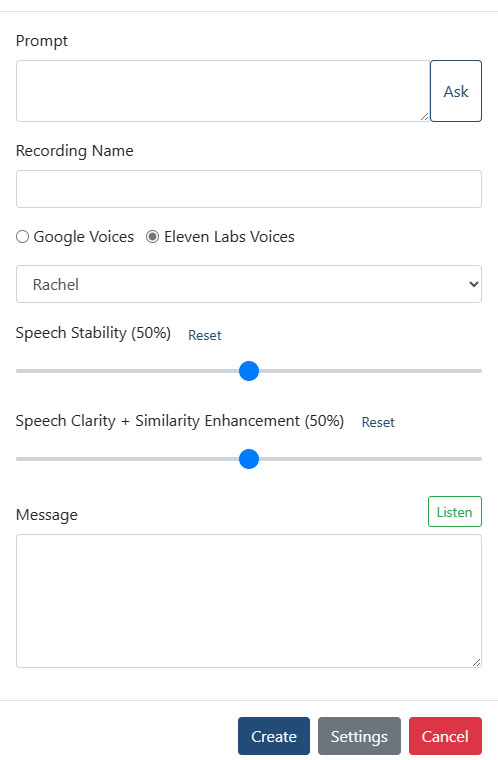
Figure 8: Speech Tool Setup
Duplicate Trunk Presets
Flow also comes with a set of module duplication tools that allow you to duplicate existing module data so that you can reuse the same information on other module instances without having to recreate from scratch. Currently you can duplicate trunks, IVRs and Queues and they can be accessed using the Tools dropdown on the navbar:
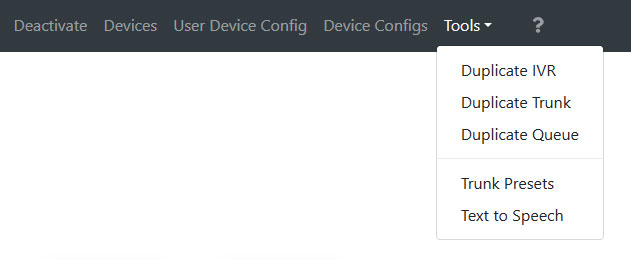
Figure 10: Trunk Tools
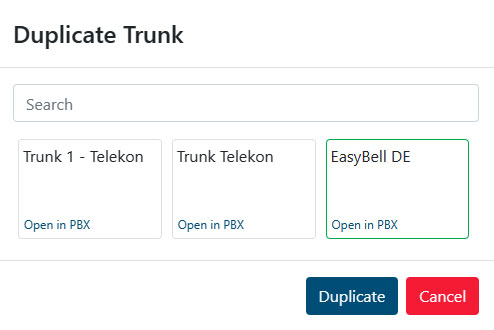
Figure 11: Duplicate Trunk
From this dialog, you can select any of the trunks and click duplicate to start filling in the unique information for the new Duplicate trunk:
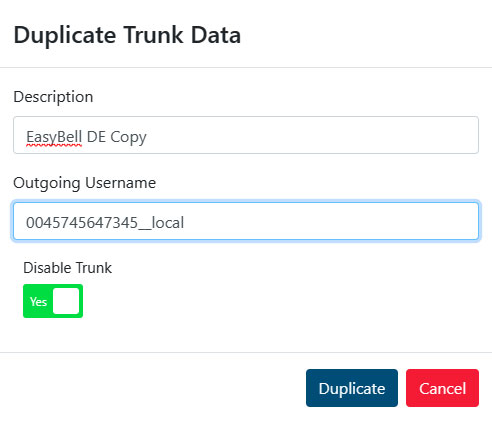
Figure 12: Duplicate Trunk Data
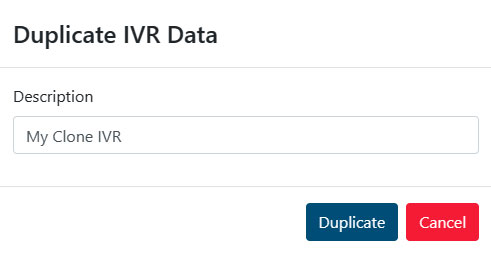
Figure 13: Duplicate IVR Data
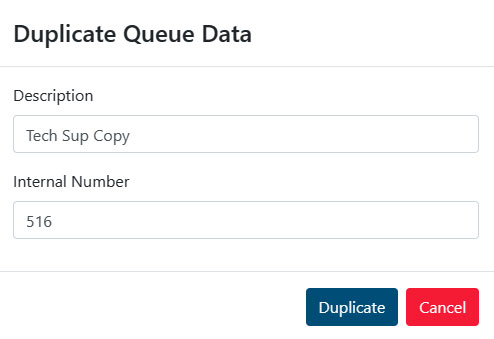
Figure 14: Duplicate Queue Data
Trunk Presets
You can also create trunk from a preset using the Trunk Presets dialog from the Tools dropdown you saw earlier. This way you can easily create a trunk from known brands without having to worry about most of the configuration parameters and simply change the parameters specific to the trunk you have acquired from each provider as seen in the images below:
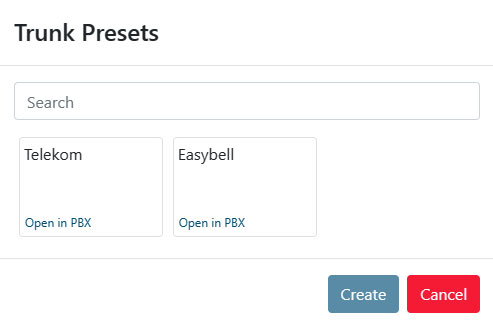
Figure 15: Trunk Presets
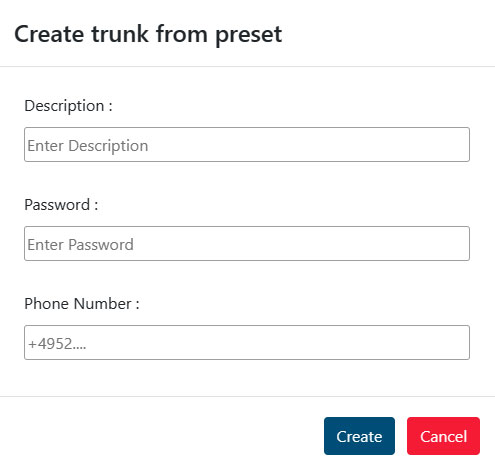
Figure 16: Create Trunk From Preset
SUPPORT
In case you require any further assistance, please do not hesitate to get in touch.

